Skip to content
How to Identify and Fix Solar Panel Problems: A Practical Guide
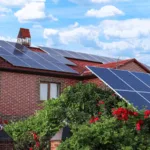
Solar panels deliver clean renewable energy and lower electricity bills, but like any technical system they can develop faults—from weather and environmental damage to wiring and equipment failures. This guide focuses on roof-mounted, grid-tied, and battery-backed systems and helps homeowners and businesses spot common solar panel issues, understand likely causes, and take the right next steps.
Read on for maintenance tips, troubleshooting steps, and clear guidance on when to call a certified pro to protect your roof and maximize your system’s energy production.
Key Takeaways
- Identify common solar panel problems early—inverter faults, shading, PID, hot spots, microcracks, and loose wiring.
- Install panels correctly to protect your roof and maximize system performance—use certified installers and proper flashing.
- Maintain your system regularly: visual checks and cleaning (typically every 3–6 months), plus an annual professional inspection.
- Protect panels from extreme weather and document any storm damage for warranty or insurance claims.
- Call experts for electrical and inverter issues—these are safety-critical and often require certified technicians.
- Assess the long-term value: incentives, tax credits, and proper upkeep improve return on investment over the system’s lifespan.
- Plan for local risks—snow, birds, and debris can reduce output; design and maintenance can mitigate these issues.
See the Troubleshooting, Maintenance, and Warranty sections below for step-by-step guidance.
Inverter Issues: Navigating Solar Power Conversion
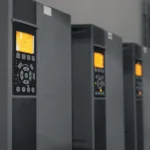
The inverter is the heart of a solar system: it converts DC electricity from solar panels into the AC power that runs homes and businesses. Understanding inverter problems and basic solar panel repair helps protect energy production and overall system performance. Compatibility between panels and the inverter is essential for safe, reliable operation.
Common inverter issues include failure to power on, error codes, and communication faults with monitoring systems. A frequently encountered reason an inverter won’t start is poor DC or AC connections—loose MC4 connectors, corroded terminals, or a tripped DC isolator. Regular visual inspections and monitoring of string voltages can prevent many downtime events. Always match inverter voltage, current and power ratings to your panel array to avoid dangerous mismatches.
Some high-efficiency inverters reach very high conversion rates at peak conditions; confirm any manufacturer efficiency claims against official specs. If you see odd behavior—like a steady fault light, repeated restarts, or dramatic drops in energy output—take immediate action: note the inverter error code and contact your installer.
| IssueImpactSolution | ||
| Voltage mismatch | Decreased efficiency, potential equipment damage | Confirm array and inverter specs before commissioning; reconfigure strings if needed |
| Inverter fails to turn on | System downtime, loss of energy production | Visually check and tighten DC/AC connections; if unclear or unsafe, hire a licensed electrician |
| Error codes on inverter | Indication of underlying faults | Record code, consult the manual, and call the manufacturer or installer if it persists |
| Communication errors | Hindered performance monitoring and system control | Verify network links, update firmware, or upgrade to compatible monitoring hardware |
Safe, periodic maintenance extends inverter life and improves system performance. Homeowners can perform non-electrical checks—inspect the inverter display, log timestamps of faults, and keep the area clear of debris—but any DC-side or wiring work must be done by a certified electrician because of shock and fire risk. If you notice a persistent error code, a large drop in energy production, or intermittent operation, contact your installer or a licensed technician within 48 hours to avoid further damage and lost energy production.
Proactive monitoring, timely solar panel maintenance, and quick response to inverter warnings help maintain peak energy output and protect other system parts. When in doubt, document what you see (photos, error codes) and escalate to professional service rather than attempting high-risk repairs yourself.
Installations and Roof Concerns
When evaluating common issues with solar panels, the quality of the installation and the condition of the roof are two of the most important factors. A correct roof-mounted installation protects the building, preserves system performance, and reduces long-term repair costs. Below are the major installation-related concerns and practical steps to avoid them.
Microcracks: The Hidden Culprit
Microcracks are tiny fractures in PV cells or the module glass that can grow over time and reduce a panel’s power output. They commonly result from thermal cycling, mechanical stress during handling or installation, or manufacturing defects. Detection methods include thermal imaging (IR) and electroluminescence (EL) testing; both help locate stressed cells before visible performance loss occurs. If microcracks are extensive and affecting energy production, module replacement is often the most cost-effective option—repair is rarely practical for full recovery.
Roof Damage: Assessing the Impact
Roof penetrations for racking and mounts are a potential source of leaks and shingle or tile damage if not executed correctly. Use high-quality flashing, industry-standard anchors, and weatherproof sealing to reduce risk. Work with certified installers who carry roofing experience and liability insurance, and verify that the mounting hardware is compatible with your roof type (tile, metal, asphalt shingle, or membrane).
Before installation, follow a simple pre-install roof checklist: confirm roof age and expected remaining life, check for rot or structural issues, verify load capacity for the added panels and racking, and obtain required permits. If your roof is older than 10–15 years or shows visible wear, get a structural and roofing assessment and consider replacing or repairing the roof before mounting panels.
Post-install inspections matter: schedule a roof and mount check within the first year and annually after that, or after any major storm. Keep clear documentation (photos, invoice for work) to support warranty or insurance claims if damage occurs.
Understanding and addressing these installation and roof concerns helps extend panel lifespan, improve system energy production, and minimize costly roof repairs—protecting both your home and your renewable energy investment.
Rooftop Solar Panel Problems: Weather and Warranties

Solar panels are durable and designed to operate through sun, rain, and cold, but extreme weather—high winds, hail, lightning strikes, and heavy snow—can cause physical damage or electrical faults. That’s why understanding your solar panel system warranties and documenting the condition of your panels is critical after any storm.
To protect your investment and preserve coverage, follow a simple maintenance routine: perform a visual check and clean panels every 3–6 months depending on local dust and pollen levels, monitor system output regularly, and schedule a professional inspection at least once a year. Many manufacturers provide product and performance warranties that range widely—panels commonly carry 10–25 year product and performance warranties, inverters often 10–25 years (or manufacturer’s standard), and batteries typically 5–12 years—so read the fine print to know what’s covered.
Remember that warranties usually exclude damage from misuse, unauthorized modifications, improper installation, and some extreme weather events. Actions that commonly void warranties include lifting panels to access the roof without installer approval, drilling into mounts, or using non-approved mounting hardware. If you spot damage, photograph it immediately, note the date and weather conditions, and notify your installer or manufacturer—filing claims promptly (within 30–60 days) helps protect your rights under warranty or insurance.
| ComponentWarranty DurationCoverage Detail | ||
| Solar Panels | 10-25 years | Covers manufacturing defects and performance degradation; excludes external damage and improper installation |
| Inverters | 10-25 years | Covers operational faults and failures; often excludes DIY installs or storm/impact damage |
| Batteries | 5-12 years | Covers cycle life and capacity; typically excludes physical abuse or extreme environmental damage |
Use monitoring tools and alerts to spot drops in power or string failures early—common alerts include sudden drop in daily energy production, inverter fault codes, or a string reporting zero current. When monitoring flags an issue, document the alert and check for obvious causes (shade, debris, visible damage) before contacting your installer. Also check your homeowner’s insurance: some policies cover solar panel damage from storms, while others require a separate endorsement—keep invoices, photos, and system monitoring logs handy for claims.
Staying proactive with maintenance, documenting any damage quickly, and keeping open communication with your installer will help you navigate weather-related issues, protect warranties, and keep your solar system producing reliable power for years to come.
Solar System Troubleshooting: Uncovering the PID Effect

Potential Induced Degradation (PID) is a subtle but serious issue that can reduce a solar panel’s energy output over time. PID occurs when a voltage difference between the module frame and the solar cells drives leakage currents that accelerate degradation of the cells or the module’s encapsulant. The result is measurable drops in system production and long-term efficiency loss if left untreated.
PID risk increases in high-humidity and high-temperature environments and can be worsened by surface contamination like dust or salt. Common signs to watch for are an unexplained, sustained drop in daily energy production on one or more strings, and string-level imbalance where one string underperforms relative to others under the same sun exposure.
| FactorImpact on PIDMitigation Technique | ||
| High Humidity | Raises PID likelihood | Use humidity-resistant modules; ensure proper system sealing and ventilation |
| High Temperature | Speeds degradation processes | Choose heat-tolerant panel technologies and allow airflow under panels |
| Dust and Contaminants | Aggravates PID and local hot spots | Regular cleaning, anti-soiling coatings in high-pollution areas |
| Technological Measures | Reduces PID impact | Install anti-PID boxes, select low-PID-risk modules (some modern technologies), and ensure proper grounding |
| Electrical Grounding | Limits frame-to-cell potential | Ground the DC negative when recommended or use anti-PID devices |
Detection and response: if monitoring shows a persistent output loss on a portion of the array, request diagnostic testing—IV curve analysis and electroluminescence (EL) imaging are standard tests technicians use to confirm PID and map cell-level damage. Early diagnosis improves the odds of recovery: some modules can be recovered by anti-PID treatments or system reconfiguration, while heavily affected modules may require replacement.
When discussing PID with your installer, ask about module PID ratings, whether the proposed inverter/array configuration minimizes frame-to-cell potentials, and whether the installer offers anti-PID hardware or grounding schemes. Proactive cleaning, routine monitoring, and choosing modules and system designs with proven PID resistance are practical ways to protect long-term energy production and overall system performance.
Maintaining System Health: Confronting Hot Spots

Hot spots are a common solar panel problem where small areas of a module overheat due to cell damage, micro-cracks, broken solder joints, or poor wiring. Left unaddressed, hot spots reduce energy output, accelerate module degradation, and—rarely—can pose a fire risk. Regular inspections and prompt solar panel repair reduce these risks and protect overall system performance.
Detecting hot spots early is key. Use thermal imaging (IR) or drone-based thermal scans to find hotspots before they cause major performance loss; electroluminescence (EL) testing can reveal micro-cracks and cell-level defects during low-light conditions. Costs vary by method—DIY visual checks are free, a professional IR/drone scan typically costs a few hundred dollars, and EL imaging is more specialized and can cost more depending on system size.
| IssueCauseImpactSolution | |||
| Hot Spots | Cell damage, flawed wiring, bad solder joints, partial shading | Reduced lifespan, lower energy output, possible safety risk | Thermal/IR inspection, repair/replace damaged cells or modules, fix wiring |
| Micro-Cracks | Thermal cycling, impact, manufacturing faults | Gradual loss of efficiency and power | EL imaging for diagnosis; replace affected modules if output loss is significant |
| Potential Induced Degradation (PID) | Voltage differences and environmental stress | Significant power loss in affected strings | Diagnostic testing, grounding/anti-PID devices, module replacement if severe |
Shading and soiling are persistent, low-level causes of reduced output. Even small, persistent shade from a vent or tree can lower a panel’s energy production dramatically; dust, bird droppings, and pollen also reduce generation. For most residential systems, clean panels every 3–6 months in moderate climates and more often in dusty or high-pollen areas. Use soft water and non-abrasive brushes or hire a pro to avoid damaging the glass or frames.
Safety and escalation guidance: do not climb on the roof with live electrical work exposed—call a certified installer for any wiring or diode repairs. If you see sparking, smoke, burning smells, or exposed molten wiring, evacuate the area and call emergency services before contacting a technician. For non-emergency issues (reduced output, visible cracks), document the problem (photos, monitoring logs), and schedule a professional inspection.
Common corrective actions include replacing bypass diodes, repairing solder joints, re-terminating connectors, or replacing modules with severe cell damage. Implement routine monitoring (string-level if possible) so you get alerts when output drops—early detection is the cheapest way to preserve efficiency and extend the lifespan of your solar panels.
Financial Considerations: The Cost of Going Solar
Switching to solar energy can feel like a big upfront expense, but incentives, lower equipment costs, and improved performance make solar systems a strong long-term investment for many homeowners. Understanding typical costs, incentives, and financing options helps you compare quotes and choose the best path to install panels that deliver reliable energy for decades.
Investment vs. Return: Understanding the Economics
System costs vary by size, equipment quality, and region. As a rule of thumb, a typical residential system (about 6 kW) often ranges from roughly $10,000 to $18,000 before incentives—your price will change with panel type, inverter choice, and installation complexity. Federal incentives such as the Investment Tax Credit (ITC) can reduce net cost (confirm current rates and eligibility with the IRS or your tax advisor). Properly maintained solar systems usually last 20–30 years and can increase your home’s resale value while lowering electricity bills; a conservative payback example: a $15,000 gross system with a 30% tax credit ($4,500) and $1,200/year electricity savings results in a roughly 8–9 year simple payback.
Avoid blanket claims about resource timelines; instead focus on regional energy price trends and your projected savings. Use local utility rates and an installer’s production estimate to calculate realistic ROI and payback periods for your roof and consumption.
Subsidies and Incentives: Navigating Financial Aid Options
Federal tax credits, state rebates, and local incentives can dramatically reduce the net cost of solar panels and installation. The Inflation Reduction Act increased federal support, but program details and timelines change—confirm current credit amounts, eligible expenses (equipment, labor, and certain battery storage), and expiration dates before you buy. Beyond tax credits, you may be eligible for state or utility rebates, low-interest loans, or net metering programs that let you sell surplus power back to the grid.
If upfront cost is a concern, there are practical financing paths: purchase in cash, use a solar loan, lease the system, or enter a Power Purchase Agreement (PPA). Buying outright maximizes long-term savings and incentives; loans spread cost while preserving ownership; leases or PPAs lower or eliminate upfront costs but typically reduce your incentive capture and long-term returns. Compare offers, read contract terms about maintenance and warranty responsibilities, and get at least three installer quotes.
Tip: use a production and savings calculator or ask installers for an expected annual energy production report (kWh) so you can compare payback estimates and choose the best system for your roof, budget, and energy goals.
Common Solar Panel Problems
As solar adoption grows, recognizing common issues with solar panels helps protect energy production and system lifespan. This section focuses on battery-related faults and electrical integrity—two areas that often cause performance drops and safety risks—and offers practical troubleshooting and maintenance guidance.
Battery Issues: Balancing Charge and Care
Battery-backed solar systems can experience overcharging, undercharging, and premature capacity loss. Those solar panel system faults shorten battery life and reduce the system’s ability to store and deliver energy when you need it. Prevention starts with correct installation, a suitable battery chemistry for your use (lead-acid vs. lithium-ion), and a battery management system (BMS) that controls charge and discharge.
- Regular inspection—visually check battery enclosures and ventilation for heat, corrosion, or swelling.
- Ensure charging is regulated by a compatible charge controller or inverter settings to prevent overcharge and deep discharge.
- Store and operate batteries in a cool, ventilated area to maximize lifespan and safety.
Electrical Integrity: Ensuring Safe Connections
Loose connections, damaged wiring, and corroded terminals are common causes of intermittent power, reduced energy production, and in severe cases, fire. Professional installation and annual electrical checks are recommended to reduce these risks. DIY homeowners can perform basic visual checks, but any DC-side work or wiring repairs should be handled by a certified technician.
- Schedule a yearly inspection by a certified pro to test, tighten, and secure electrical connections.
- Use durable, corrosion-resistant wiring and rated parts to minimize failures.
- Address any corrosion, discoloration, or wear immediately—don’t wait for performance to drop further.
| IssueSignsSolutions | ||
| Battery Overcharging | Swelling, excessive heat, reduced battery life | Install a BMS/charge regulator and follow manufacturer settings |
| Loose Connections | Intermittent power, sparking, inconsistent output | Tighten and re-terminate connectors; have a pro inspect DC/AC terminations |
| Wire Corrosion | Discolored conductors, voltage drop, erratic production | Replace with corrosion-resistant wiring and protect connections from moisture |
| Undercharging | Low battery SOC, frequent backups to grid, slow charging | Check for panel shading, clean panels, verify charge controller settings |
Simple troubleshooting flow for homeowners: if the inverter shows an error code, note the code and timestamp, visually inspect panels and visible wiring for debris or damage, check monitoring app for string-level drops, then call your installer if the issue persists. Keep safety in mind: batteries and DC wiring are hazardous—leave internal battery work, high-voltage tests, and inverter wiring to licensed technicians.
Battery care differs by technology: lead-acid batteries are more sensitive to deep discharge and require ventilation, while lithium-ion batteries tolerate deeper cycles and have integrated BMS protections but can be more expensive to replace. Ask your installer which battery type best fits your energy production and usage patterns.
Finally, create a simple maintenance log—date inspections, capture photos of any problems, and save monitoring exports—so you and your service provider can spot trends in energy production and diagnose problems more quickly. These steps help maintain safe electrical connections, protect your panels and batteries, and keep your solar system producing reliable energy.
Sustainability and Disposal: The Recycling Dilemma
As solar energy deployment expands, end-of-life management for solar panels becomes an urgent sustainability issue. Recycling solar panels can recover valuable materials and reduce environmental harm, but current collection and processing infrastructure lag behind installed capacity. Understanding the recycling economics and practical disposal options helps owners plan responsible decommissioning.
Global projections estimate large volumes of panel waste by mid-century; reported estimates vary by source, so verify projections for your region and the systems you install. In many markets the formal recycling rate remains low today, while the European Union has set stricter producer-responsibility rules and higher recovery targets than some other regions. Improving recycling systems worldwide will be essential to avoid large-scale solar panel damage and waste streams as arrays reach end of life.
- High material recovery potential: modern recycling techniques can reclaim most glass and a high percentage of semiconductor materials and metals from modules—helping recover parts and reduce the need for new raw materials.
- Cost considerations: recycling logistics and processing costs can vary widely; reported per-panel recycling costs depend on local collection, transport, and facility scale. Policy and extended producer responsibility programs can shift costs and improve recycling rates.
New technologies and pilot processes have shown promising recovery rates for critical materials (for example, high-purity silver recovery in laboratory settings), and larger-scale facilities are being developed in several countries to process thousands of tons per year. Still, regional differences in regulation and economics mean recycling availability and costs vary—check local options before decommissioning.
Practical advice for owners: do not discard panels in regular trash or local landfills. Instead, contact the original installer or manufacturer about take-back programs, check local recycling centers for e-waste or solar-specific streams, or work with certified waste handlers. When removing panels, follow safe handling procedures—modules can contain hazardous solder and encapsulant residues and should be handled by trained technicians.
| YearGlobal Solar Capacity (GW)Estimated Panel Waste by 2050 (million tons) | ||
| 2000 | 1.4 | Data Not Available |
| 2020 | 760 | Data Not Available |
| 2050 (Projection) | 4,500 | ~80 (varies by source) |
Action steps: document panel model and purchase details when you install (serial numbers and invoices help future recycling), ask installers about end-of-life options, and search for regional recyclers or manufacturer take-back programs. If you’re unsure where to start, contact your installer or local waste authority for guidance—planning ahead makes it easier and less costly to recycle panels responsibly and protects the long-term sustainability of solar energy production.
Electrical Challenges: Diagnosing and Correcting Issues
Fixing common solar panel problems requires a systematic, safety-first approach—especially for electrical faults. Issues that look minor (loose wiring, dirt) can signal deeper system problems like failing inverters or damaged modules. Below are common electrical failures, how to diagnose them safely, and when to call a professional.
Common issues and immediate steps:
- Loose wiring: A leading cause of intermittent power and safety hazards. If you see arcing, discoloration, or sparking, shut down the system if safe and call a certified technician immediately.
- Soiling and debris: Dust, pollen, and bird droppings reduce output; regular cleaning prevents gradual production losses. In many climates, cleaning every 3–6 months is appropriate—more often in dusty areas.
- High temperatures: Heat reduces panel efficiency (a phenomenon called temperature coefficient or “heat fade”). Choose high-temperature tolerant panels and design for ventilation to limit losses.
- Cell or module cracks: Cracks in PV cells cause slow performance declines and may necessitate module replacement when energy production falls below acceptable levels.
Use diagnostic tools and a basic workflow before escalating: check your monitoring app for string-level drops and inverter error codes, visually inspect visible wiring and modules for damage, and note timestamps and screenshots of errors. Basic homeowner-safe tools include the monitoring dashboard and a visual inspection; do not open inverter or DC electrical compartments—leave that to licensed technicians.
| IssueImpact on PerformanceSuggested Action | ||
| Loose Wiring | Operational hazards, inconsistent output | Document, shut down safely if needed, and have certified technicians inspect and secure connections |
| High Temperatures | Heat fade reduces peak output | Specify heat-tolerant modules and allow airflow under the array; ensure proper system sizing |
| Dirt and Debris | Decreased energy production | Establish a cleaning schedule; use soft water and nonabrasive tools or hire a professional |
| Physical Panel Damage | Gradual efficiency loss, potential safety issue | Inspect, document damage, and replace modules if production loss is significant |
Recommended diagnostic tools and safety checklist (for pros or supervised technicians): multimeter for open-circuit and string voltage checks, infrared camera for hot-spot detection, clamp meter for current checks, and appropriate PPE. For homeowners: monitor the system app weekly, photograph anomalies, and schedule an annual certified inspection and after any major storm.
When in doubt, prioritize safety. Electrical faults can cause injury or fires. Schedule certified inspections, keep a maintenance log (dates, photos, monitoring exports), and follow installer guidance for parts and warranty-approved repairs. Regular professional maintenance and prompt action on electrical warnings preserve performance, protect your roof and equipment, and keep your solar system producing reliable electricity for years.
Solar Panel Performance: Efficiency and Aesthetics
Maximizing solar panel performance means addressing common problems while also considering how panels look on your home. Proper design, placement, and maintenance keep systems producing clean solar energy efficiently—and a thoughtful aesthetic approach helps panels fit into the neighborhood and increase homeowner acceptance.
Optimizing Energy Conversion
Panels lose output when shaded, dirty, or improperly tilted. Small, persistent shade or soiling can cut a panel’s energy production noticeably; typical soiling losses range from a few percent up to double digits in very dusty areas. Simple fixes—correct tilt and azimuth, routine cleaning, and removing nearby shade—often recover the most lost production.
Technology upgrades can also help capture more sun: single-axis trackers can boost annual energy production by roughly 10–25% depending on latitude and roof constraints, while two-axis trackers can add more in open-field systems (less common on rooftops). Choose panels with favorable temperature coefficients if you’re in a hot climate—these modules retain higher efficiency at elevated temperatures.
Integrating Solar Aesthetically into Home Design
Homeowners weighing aesthetics against performance have several options. Frame color and module style (silver frame vs. all-black) affect appearance and can slightly influence heat absorption—black modules may get warmer, so check the manufacturer’s temperature coefficient. Solar tiles and integrated roofing solutions blend panels into the roofline but often carry higher upfront costs and different installation requirements.
| Panel TypeCostDesign AppealEfficiency / Notes | |||
| Silver Frame | Most cost-effective | Utility-focused | Standard performance |
| Black Frame | Moderately higher | Sleeker appearance | Slightly higher heat absorption; check temperature coefficient |
| Black on White Frame | Competitive | Versatile, modern | Good trade-off of cost and looks |
| All-Black (standard) | Higher | Less visually intrusive | Popular for rooftops; minor heat effects possible |
| Integrated Solar Tiles | Highest initial investment | Seamless, architectural | Varies by product; often more expensive to install/repair |
When choosing aesthetics, ask installers for sample mounts and mockups, and request production estimates for the proposed layout so you can compare appearance with expected energy output. If curb appeal is a priority, work with design-focused installers who can balance visual goals with system efficiency. Request aesthetic quotes and sample installs from certified providers to find the best way to meet both performance and appearance goals.
Conclusion
Maintaining a solar panel system involves ongoing attention to both technical and environmental challenges. From inverter malfunctions to end-of-life recycling, troubleshooting solar panels requires a mix of regular upkeep, prompt diagnosis, and professional help when electrical or structural issues arise. Common problems—snail trails, microcracks, PID, hot spots, and wiring faults—are manageable when caught early and addressed correctly.
Be proactive: perform visual checks and clean panels every 3–6 months (more often in dusty areas), use monitoring tools to catch drops in energy production, and schedule a certified inspection annually or after major storms. Prompt action prevents small issues from damaging your roof, causing hot spots, or shortening component lifespan.
Switching to solar is a meaningful step toward clean, renewable energy, but long-term success depends on careful maintenance and responsible disposal planning. For peace of mind, book a system health check with a certified installer or download a maintenance checklist to keep your panels producing reliable energy for years to come.
FAQ
What are some common solar panel problems?
How can I troubleshoot solar panel issues?
What are the best practices for maintaining my solar panel system?
How do I deal with inverter problems in my solar panel system?
What should I check for if I suspect roof damage after solar panel installation?
What is Potential Induced Degradation (PID) and how can it be remedied?
What measures can prevent hot spots in solar panels?
How does the financial investment in solar compare to its return?
How can I find out about subsidies and financial aid options for solar panel installation?
What batteries are recommended for off-grid solar panel systems?
Why is solar panel recycling considered a complex challenge?
How do I diagnose and correct electrical issues in my solar panel system?
How can solar panel performance be optimized for efficiency?
How can solar panels be integrated aesthetically into my home design?